
10 Tips for Getting Started in 3D Modeling with Autodesk Fusion
Dodge some pitfalls and get up to speed quickly in one of the most powerful free modeling tools on the planet.Maker Projects

Photo: Jacob Bobo
If you're getting into the world of 3D printing, you'll find amazing models out there free for download on sites like Thingiverse, Printables, and more. If that's not enough, hundreds of active communities on various social networks are full of things you can feed straight into your slicer. Whether it's toys, tools, or tchotchkes, there's an endless supply.
But at some point, you'll run into a situation where you want something that doesn't exist. This is when you need to turn to a 3D modeling tool. Once the exclusive domain of specialists with advanced training in computer-aided design, or CAD, many modeling tools today are not only free for personal use but approachable enough that anyone with a bit of technical know-how can use them.
I've tried a fair few over the years, but I keep coming back to Autodesk's Fusion. It's intuitive enough for a total newbie yet powerful enough for professional use. I've designed and printed everything from car parts to household utility items, going through the school of hard knocks along the way. Here are a few tips that will help you get off to a good start and avoid a few common pitfalls.
Key Concepts
Before we get started, it's important to understand a few key Fusion concepts.
- Sketch: As its name implies, this is a two-dimensional drawing that you'll use to help create your objects. You can use sketches to define shapes, distances, profiles, and all sorts of things, then use those as templates for moving into 3D.
- Body: When working in 3D, you'll be working with bodies. This is a three-dimensional shape that you've created, likely with the help of a sketch.
- Component: A component is basically a way of bundling bodies, sketches, and other information together, segmenting different parts of your project to keep it from getting unwieldy.
 All screenshots by Tim Stevens
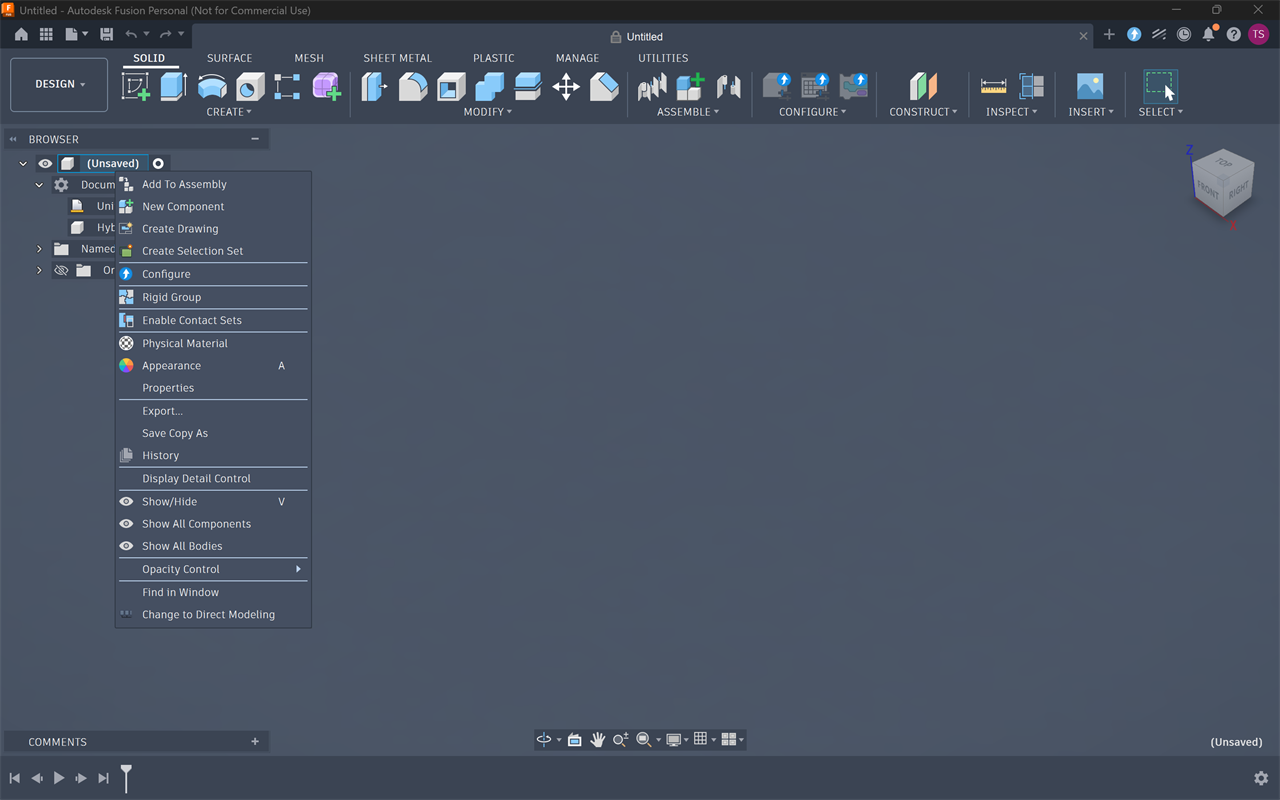
1: Start with a new component
Whenever you're starting a new project in Fusion, get in the habit of creating a new component first. You can just jump right in and start modeling if you like, but using a component to keep everything relating to a given model together is good practice.
This is especially important when you start working with more complex projects featuring multiple components that assemble together, like perhaps a custom pen with a cap or a box with a hinged lid. Fusion makes working with and assembling multiple-model projects like this relatively easy, but only if they're separate components.
 2: Parameterize everything
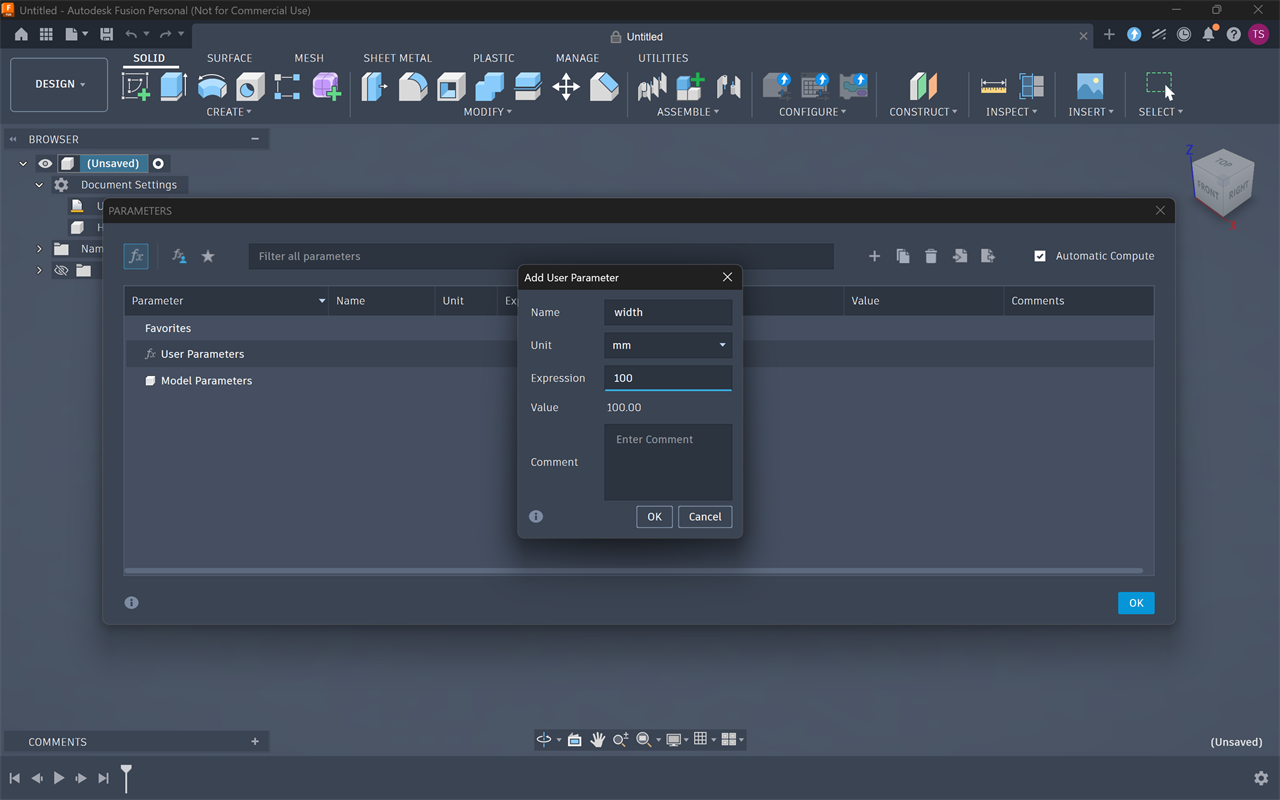
Fusion is formally called a parametric modeling tool, and while that implies a few different things versus old-school CAD, one of the most important is the use of parameters. This is simply a way of giving names to values, a little like variables if you're familiar with software development.
Let's say you're working on that box I mentioned above. You want it to be 100 mm wide and 200 mm long. Fusion makes it easy to make a box of those dimensions, and you could simply type those values in. When making the lid, it's easy enough to remember those values and type them in again.
But what happens if you then decide you want that box to be 300 mm long instead? Now you have to remember to update the lid as well, simple enough on such a small scale, but extremely difficult or even impossible on larger projects.
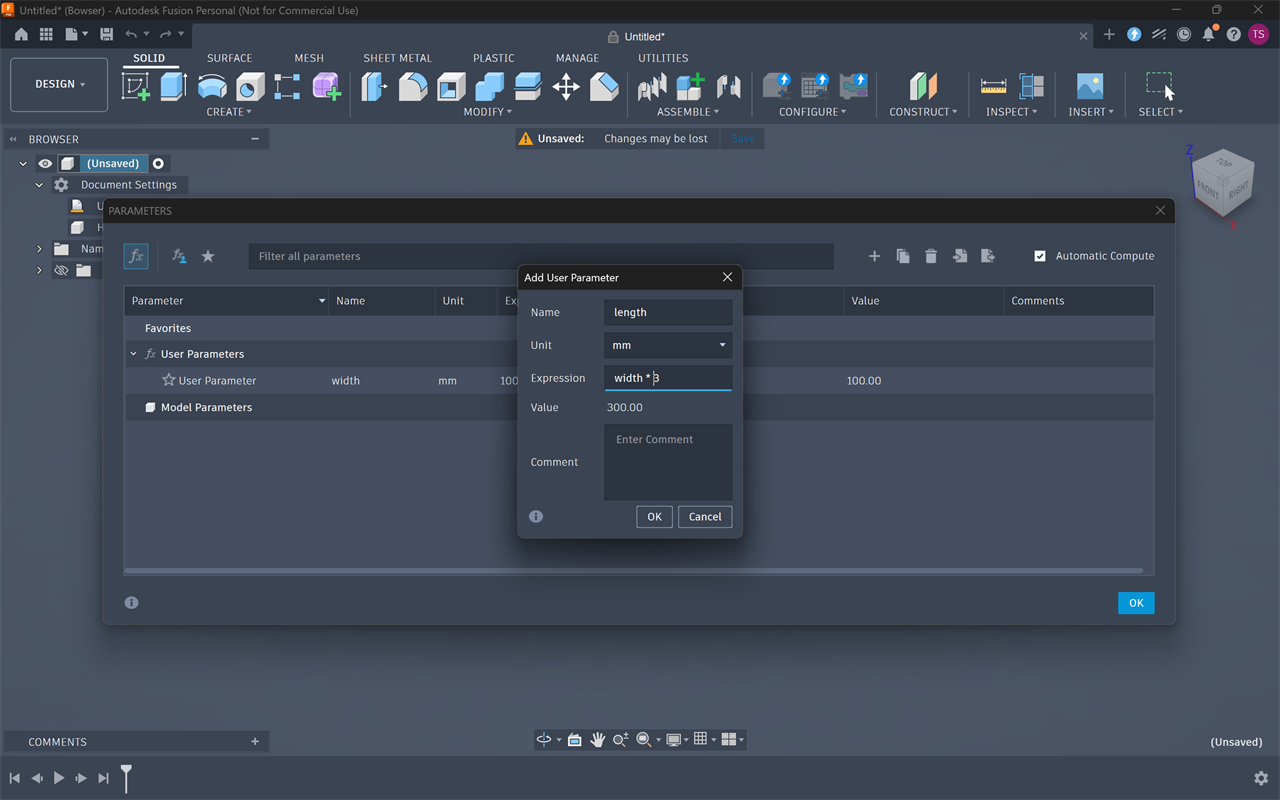
Instead, use Fusion's Change Parameters function and define one called width and a second one called length, each with your desired values. Then, when you're creating your sketches and bodies, use those names instead of the actual values. In this way, you can just go back and edit the value of length and, if you've modeled everything appropriately, your sketches and bodies will update like magic.
 3: Keep it relative
Instead of relying on absolute values for everything, get in the habit of using proportions and relative values. Instead of defining an absolute position for a given feature, like a hole for a screw, make it relative to another feature so that it stays in the right place.
You can use parameters to help with this. For example, if you want your box to always have a length of three times its width, just set your length parameter to "width * 3".
 4: Give everything a descriptive name
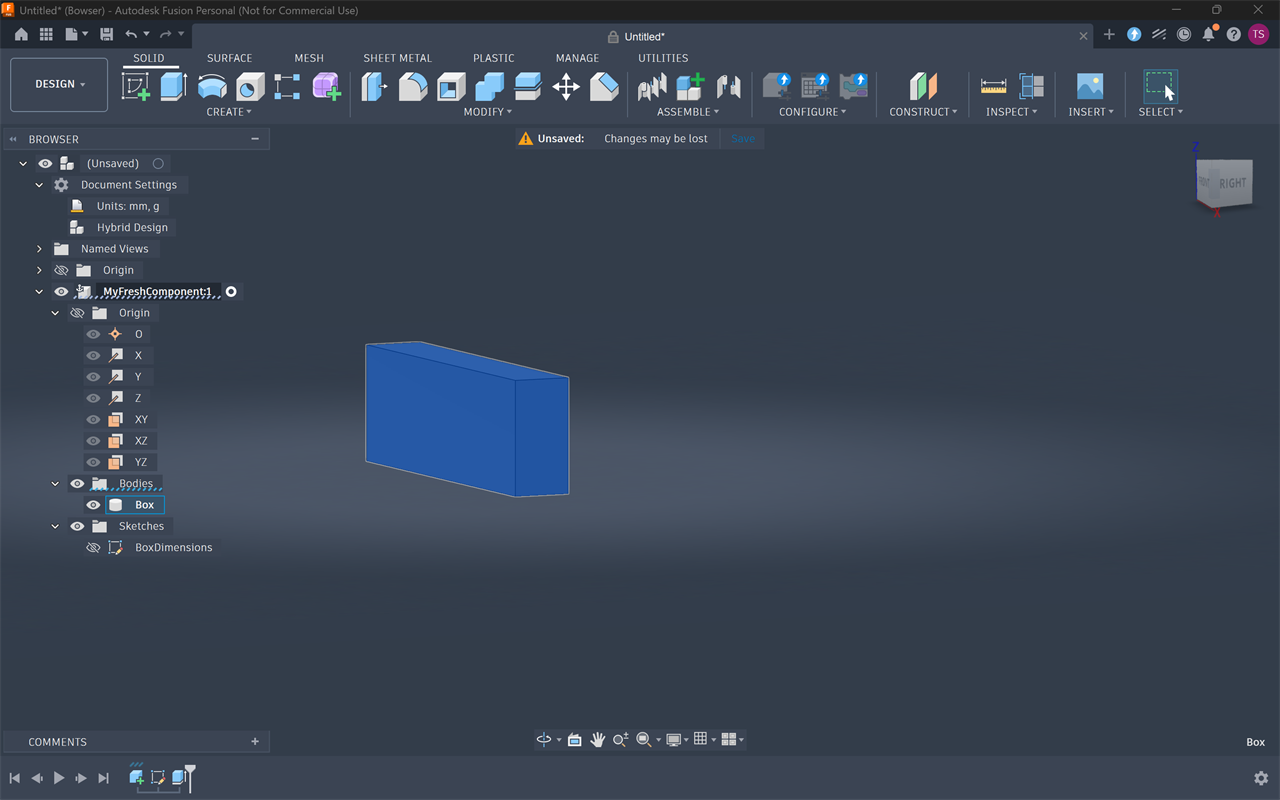
Fusion assigns default names to everything you create, and if you're not careful, you'll wind up with dozens of sketches and bodies with meaningless names like "Sketch123" and "Body6".
To avoid this, get in the habit of naming everything when you create it. Every parameter, sketch, and body should have a meaningful, unique name that will make it easy to find later.
This includes versions! Every time you manually save in Fusion, it'll ask you for a version number and a name. Type in a quick description of what's new since the last time you saved. Fusion makes it easy to roll back model changes in most situations, but being able to step back to an older version of a file can be a real lifesaver.
 5: Sketch everything you can
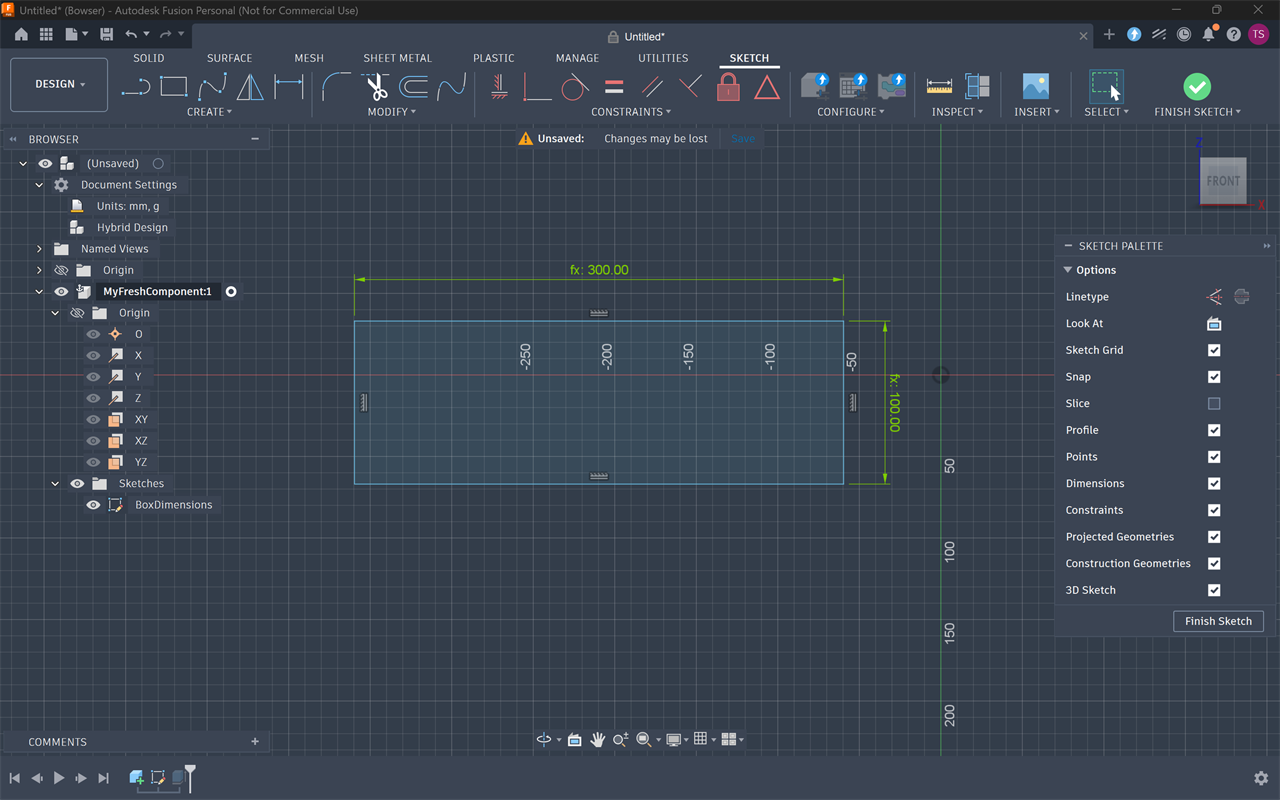
Your goal may be a three-dimensional model, but the more of your model you can form in two dimensions, the easier it'll be to keep updated. Using sketches to define key shapes and dimensions makes it easy to apply those things across multiple bodies.
And, just like changing a parameter, if you modify a sketch that's used to define various features in your model, the model you created from the sketch will be automatically updated.
For example, if you want to create a screw hole at a specific point that cuts through multiple bodies, having it on a sketch makes it extremely easy to line up across all those bodies to start. If you need to move that hole, updating the sketch will update all your bodies instantly.
 6: Watch your timeline
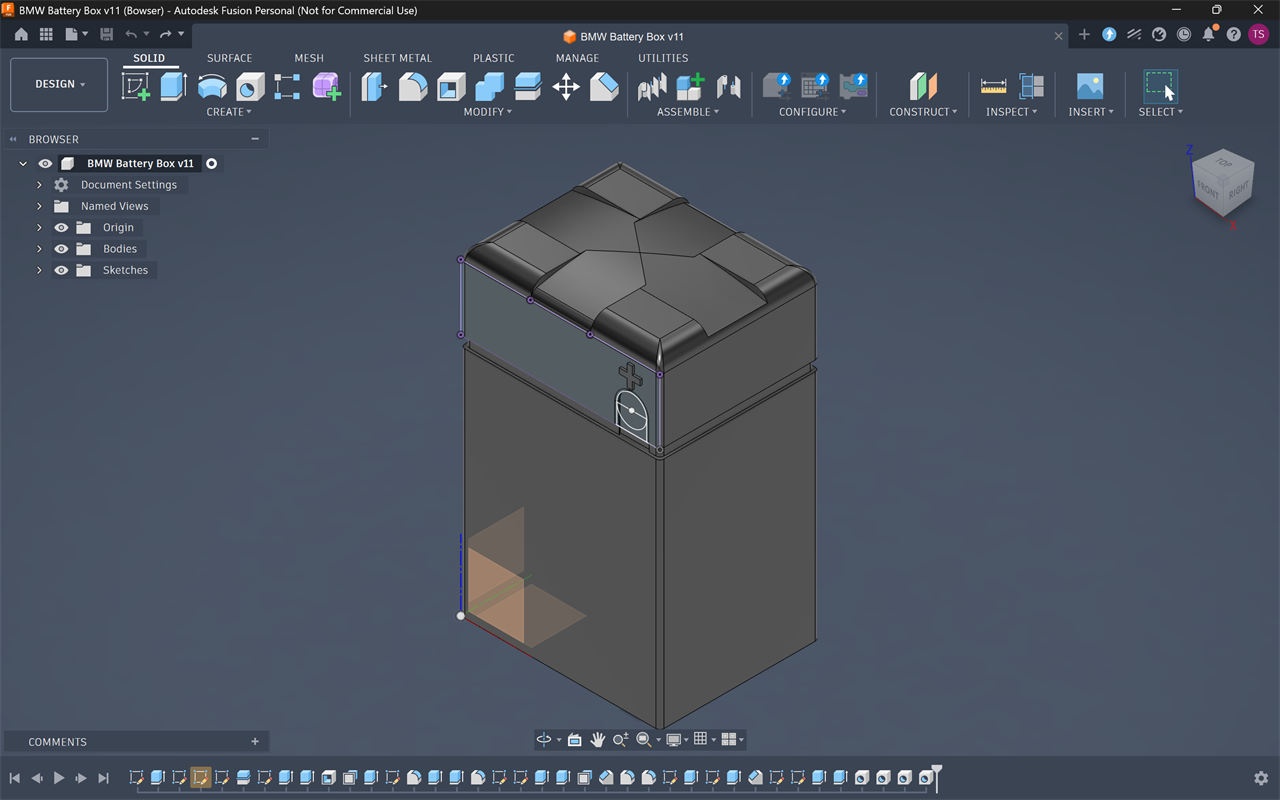
Beyond the use of parameters, a major feature of Fusion is the use of a timeline. This is like a built-in time machine for your project. Nearly every action you take is reflected in a horizontal row at the bottom of your workspace. Through this you can not only roll back those actions but also modify or rearrange them.
Let's say you created a 5mm chamfer on the edge of your box, but you want it to be 3mm. Find the chamfer action on the timeline, double-click on it, and you can change the value. You can also drag the caret left and right to see what your project looked like before a certain change.
 7: Think about printing
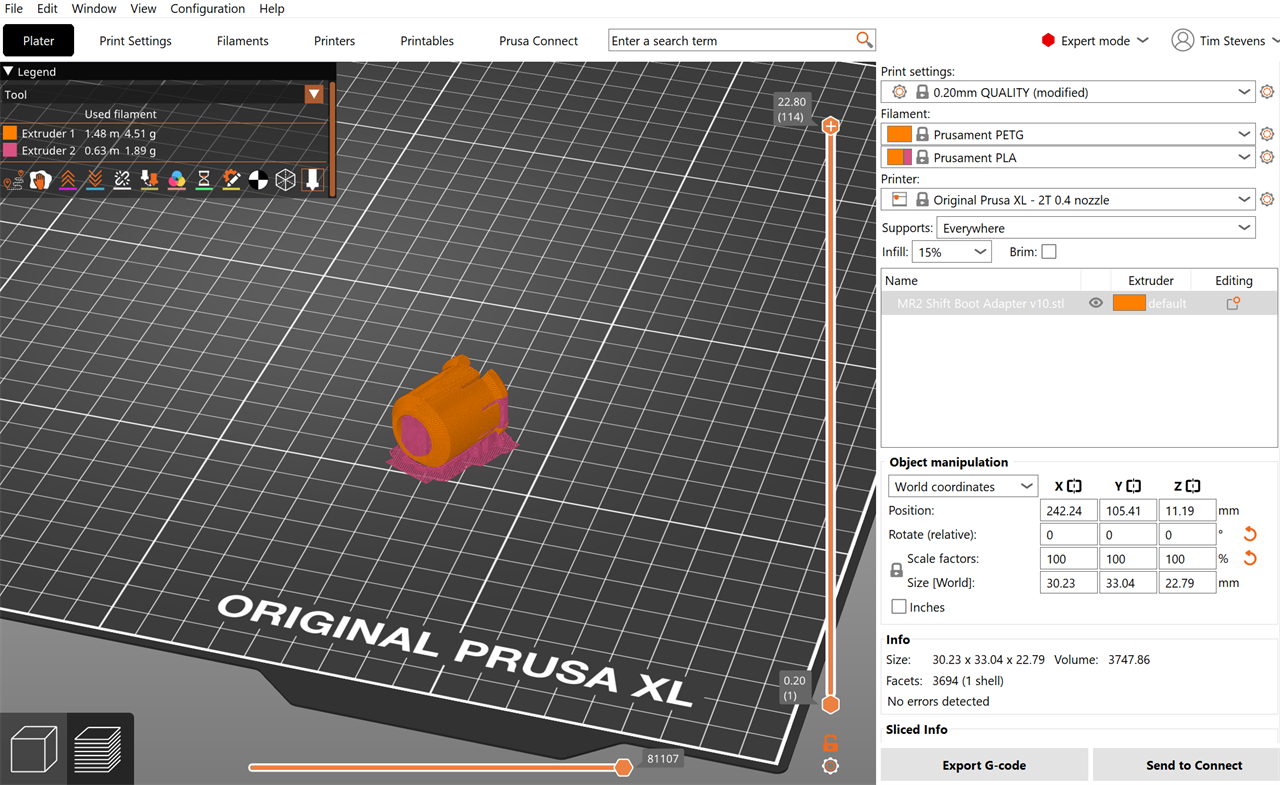
It's important to consider how you'll print or otherwise manufacture your component right at the beginning. Limitations of filament-based fused deposition modeling (FDM) vs. resin-based stereolithography (SLA) printing mean that what prints beautifully on one type might be practically impossible on another.
- Print orientation: Can you model your part so it will be stable on a print bed and not require supports?
- Structural integrity: If it's an FDM printer, like the Bambu Lab A1, will the layer lines create structural weakness? If you're printing in SLA, like on the Anycubic Mono Photon 4, will the part have enough strength?
- Machine tolerances: While many modern printers are extremely accurate, some will require you to leave extra gaps between components to ensure they fit, as with the lid on our theoretical box.
Tolerance is another great thing to set as a parameter. As you get your printer dialed in, or move on to a new one, you can quickly and easily update your models by changing your tolerance value.
 8: Use the McMaster-Carr catalog
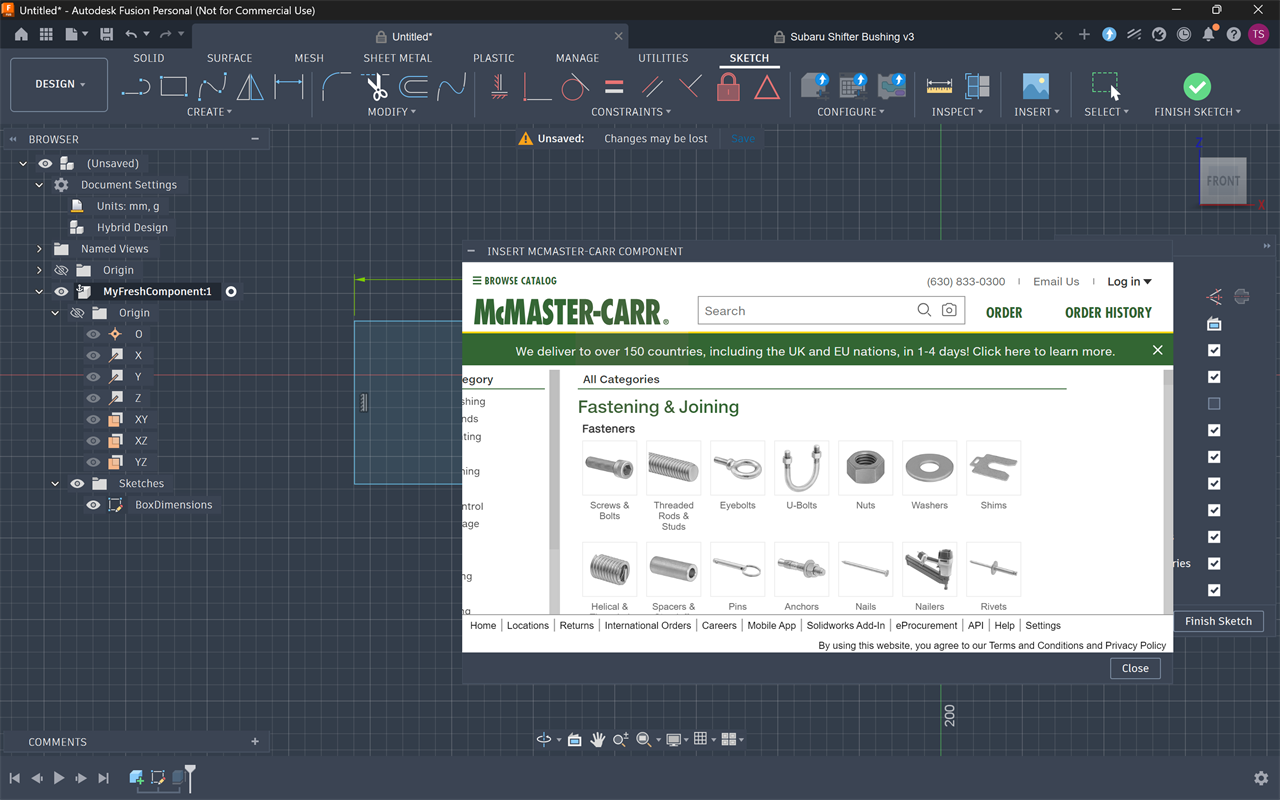
One of the most powerful tools in Fusion is the McMaster-Carr catalog. It contains exact three-dimensional representations of more than 700,000 parts that you can add directly to your project. It's right there under the Insert menu.
Theoretically, this means you can print your own bolts or screws if you really want to, but more importantly, you can use these bodies as references. Not sure how long the non-threaded shank portion of a five-inch coarse-thread bolt is? Add it to your project and find out.
Want to create the perfect threads for an M12 bolt? Add it to your project, position it where you want it, and then use Fusion's Combine -> Cut command and subtract it from your model. The results are exact every time.
 9: Save fine details, like chamfers, for last
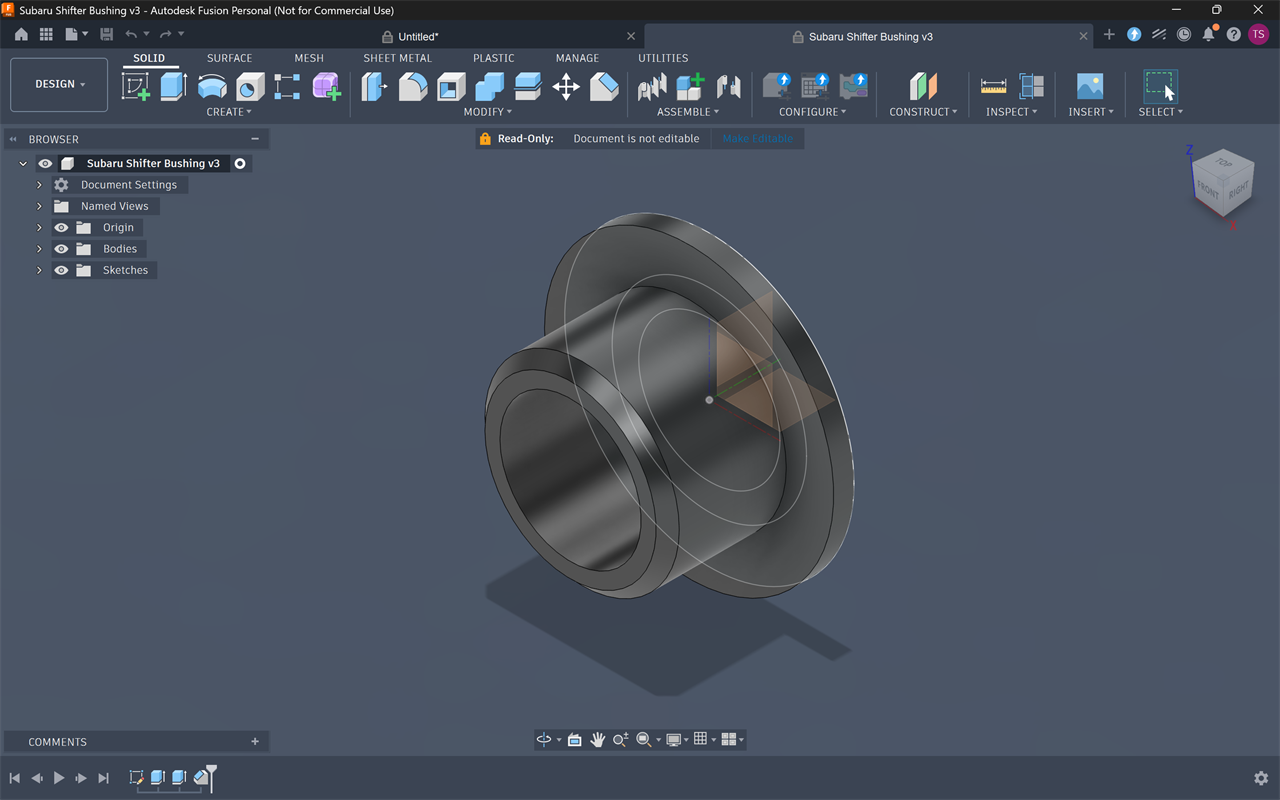
When you're creating your model, it's tempting to make everything perfect along the way. That's actually a bad idea. Things like chamfers and filets, the fine angles and curves that you can use to give your models a professional look, tend to break easily as you're refining your model.
For that reason, it's best to save them for last, until you've got everything as you want it. Then, add on the smaller details and make your model shine.
 10: Learn by copying
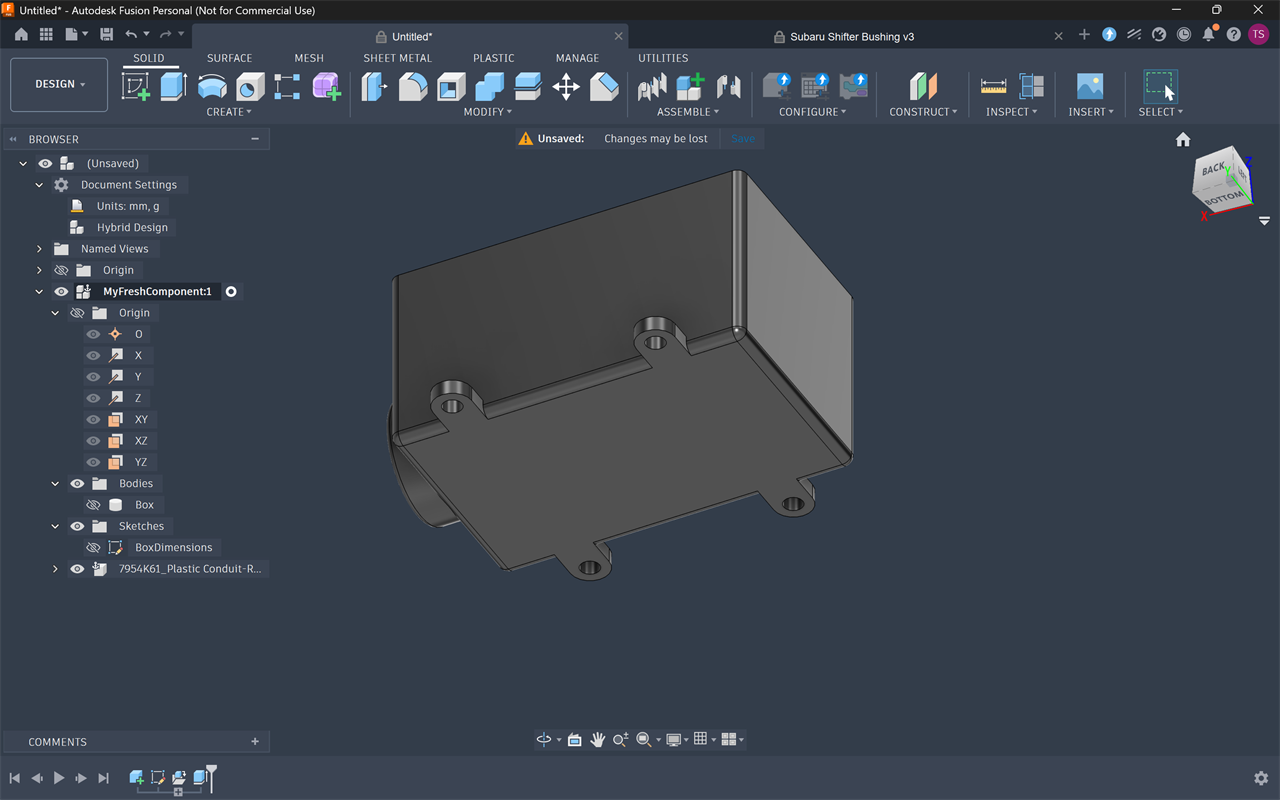
Finally, one of the best ways you can learn Fusion is to copy something. A great example is this video by Fusion wizard Lars Christensen, who starts off by re-creating a plastic conduit box. It's the kind of thing you can buy for a few dollars, not worth the time and effort of re-creating. However, recreating its combination of simple shapes is a great tutorial for first-time Fusion users.
Once you get the basics down, from there you can confidently dive into whatever project you want and learn as you go. Remember the basics above, and you shouldn't back yourself into any corners that a little Googling can't get you out of.
More from MC News
- Run AI Locally: The Best LLMs for 8GB, 16GB, 32GB Memory and Beyond
- How to Use Local AI With Your Own Files: A Beginner's Guide to RAG
- Reading vs. Answering: The Two Hardware Bottlenecks Behind Local AI Performance
- How to Use a Local LLM in Visual Studio Code
- Hands-On with the AMD Ryzen AI Halo
- Quantization Explained: Why the Same LLM Gives Better Results on High-End Hardware
- Why Context Length, Not AI Model Size, Is Your Biggest VRAM Problem
- How to Use LM Studio to turn your PC into an AI Server
- Why VRAM and Memory Bandwidth are Key for Powering Local AI
- Keyboard 101: Intro to Computer Keyboards
- Fix It Yourself: Talking to iFixit on Why Repairable Tech Matters
- The Local LLM Your Laptop's Been Waiting For
- Gemma vs Qwen: Which Local AI is Best?
Tim Stevens is a freelance automotive and technology journalist with more than 25 years of experience. Tim frequently contributes to major domestic and international online, print, and broadcast news outlets including MotorTrend, TechCrunch, Wired, CBS and the AP, sharing his insights and perspectives on everything from cybersecurity to supercars.